Category Archives: vegetables

Start your cool season veggies

Plants and trees know when it’s time to bloom and begin growing for the season.  Driving around our area I’ve seen the huge flowers of the saucer magnolias starting to unfurl. Many plum trees look like pink clouds they have so many blossoms. It’s time to start planning and planting the vegetable garden.
 
Towards the end of this month start your tomato and pepper seeds indoors so they are ready to transplant outdoors in 6-8 weeks. Meanwhile, begin sowing seeds of cool season vegetables outside. Prepare the soil by amending with compost and plant seeds for carrots, peas, spinach, beets, chard and lettuce. You can get a jump on your spring harvest by setting out starts of broccoli, cabbage, cauliflower and green onions.

If you don’t want to wait even that long to start eating your own healthy vegetables, try growing micro greens inside your house like houseplants. It’s similar to sprouting alfalfa, cress, sunflower and buckwheat seeds in a jar and eating them before the second set of leaves emerge. Micro greens, however, can be grown in soil, sprinkled on sponges or fine textured fabric. Because they won’t be around long enough to flower or fruit, they don’t need much light. . It takes about 30 days for micro greens to set their first leaves and be ready to harvest. When the first leaves appear they are at the peak of their nutritional concentration.

What do they taste like? Well, carrot greens, after they set their first true leaf, taste exactly like a carrot. Emerging radish leaves are spicy, cabbage is mild, while sunflowers are nutty. The first swiss chard leaf tastes like spinach, beets have an earthy flavor and kale is slightly sweet. The most intense flavor comes when that first leaf opens as they begin to manufacture energy from light.  Think of them as chia pets you can eat.

Planting Bare Root

At first glance,  bare root trees,  shrubs , vines and berries don’t look very inspiring.  It’s hard to imagine that those dormant branches harbor a bounty of fruits, flowers and vegetables.  It can all be yours, however, by planting from bare root stock now available in nurseries.

What exactly are bare root plants and why do they make a good choice when you want to add to your garden?  Bare root plants are carefully dug up at growing grounds  with their roots bare, meaning that most of the dirt around the roots has been removed.   One of the largest growers harvests 2 million bare root plants iSyringa chinensis
n a 30 day period, usually in December.

One of the primary advantages of bare root plants is that they tend to have an extensive, well developed root system as a result of being allowed to develop normally.  When the trees are handled well, the root system is left intact, and the tree, shrub, vine or berry will have a better chance of rooting well and surviving when planted.   Bare roots don’t have to adapt to any differences between container soil and your garden’s.  Bare root trees are also cheaper to ship because the lack of a dirt ball makes them much lighter, and this lightness makes them easier to handle, too.

Shop for your plants in January or February while they are still dormant.  Once leaves emerge or flower buds start to swell your tree or shrub’s roots have already started growing and they won’t do as well.  With this in mind be wary of spring sale bareroot stock.  Also trees or shrubs in packages may have had their roots pruned to fit inside or the packaging material may have dried out or become soggy.  Better to see the roots for yourself before you bring your new addition home.
   
The age of bare root trees and shrubs varies. Generally they are between a two and three years old.  You will not be able to see much when you purchase a bare root plant, as it will be leafless  since it is in a dormant state, but in the spring, it will come to life and transform the garden.

There are several steps to planting bare root trees.  It’s important to plant your new arrival soon after you bring it home to insure the roots do not dry out.  If you’re unable to plant right away, lay it down and cover with moist soil or compost. When you’re ready to plant,  first trim any roots that are broken with sharp pruners.  Broken roots can rot but cleanly cut ones will heal and grow. Then soak the plant in a tub of water for an hour , while you prepare the soil for planting.  Loosen the soil in a wide radius around the area where you plan to plant.  Then, dig a big hole much larger than the root ball of the plant and as deep as needed to accommodate the roots  so that the roots will have room to stretch out, rather than being compressed in the planting process. 

Next, wrangle an assistant if you are planting a large tree, shrub or vine like a wisteria.  While one of you holds the plant in the hole, making sure that if it has a graft this is above the level or the soil.  The other should gently shovel in dirt, trying not to pack it down too hard. You want the soil to be loose enough to filter down among the roots.  Make sure that the assistant holds the tree straight and in such a way that the roots are suspended in the hole, rather than pressed against the bottom. If your soil is extremely sandy or clayey amend it with 20% compost.

As you shovel in soil, make sure that the roots are spread well apart.  Fill the hole halfway, gently shake the plant up and down to let soil sift down, then tamp lightly and fill the rest of the hole. The soil should fill in the air spaces around the roots and when you water it in the first time, use lots of water to eliminate the air pockets and settle the soil.  Making a watering ring around the plant makes watering easier and you’re assured that the root zone is thoroughly watered.  When the planting is finished, mulch the tree, leaving  a few inches of unmulched soil around the trunk.   Don’t water again until the soil is dry an inch or two down.  Winter rains hopefully will  take care of this for you for a long time.  Dormant plants need much less water than actively growing ones and their roots develop poorly in soggy soil.
 
Only stake your new tree if you live in a windy area.  A trunk will attain a larger diameter if it’s allowed to move slighly in the wind.  Usually it’s not necessary to prune a young tree much while it is trying to grow new roots. Trimming a long branch or leader by a third is OK if necessary.  You can start limbing up a shade tree after a couple of years if you wish.

There are many fruiting , flowering and shade trees to choose from.  Also shrubs like roses, lilacs and pussy willows are available bare root.   Wisteria vines are especially easy to plant  bare root as are .  Don’t miss this opportunity to add to your garden’s bounty.    


Put your Garden to Bed

 There’s a peaceful quality to this time of year.  Mother Nature is winding down for the season turning deciduous trees ablaze with fall color.  Cool season pansies and violas turn their little faces to catch the sun.  It’s time to put the garden to bed for a greener spring next year. 

 Here are some suggestions, but promise you won’t try to do everything on one weekend.  it’ll just seem like work.  Gardening should be something you enjoy. 

  • Build up your soil by layering the vegetable beds with 2" of leaves newly fallen from your trees.  Soil building worms and organisms will start their work right away.  In the spring, dig what’s left into the soil.  If you want the leaves to break down faster, run over them with a lawn mower, then rake them up for mulch.
  •  Prevent erosion of your precious soil by mulching with straw or bark.  Mulch used around perennials, shrubs and trees will help moisture percolate into the soil instead of running off into storm drains or creeks along with fertilizers.    Mulch also keeps the soil from becoming compacted by winter rains.  If you don’t have enough leaves to use as mulch try layering newspapers and cardboard and cover with straw.  3-4" of mulch around the base of trees and large shrubs will hold weeds down, too.  Be sure to keep mulch a couple of inches away from the base of your plants so trapped moisture doesn’t rot the trunk. 
  • Chop down leftover vegetable plants and spent annuals flowers and layer on the vegetable bed under cardboard to decompose.  Don’t do this with diseases plants such as squash plants with powdery mildew.   These can be put in the curbside yard waste can.  Hot commercial composting systems can kill disease spores.
  • Clean empty pots and store them upside down in a dry location.  That way you’ll keep any soil diseases from being passed on to next year’s plants. 
  •  Store any excess leaves to use next summer if you have a lot of deciduous trees.  They’re like gold.  They make great bedding for a worm bin and next summer you can use them in the compost pile when you have an abundance of nitrogen rich green material but little carbon-based brown stuff to mix with it. 
  • Leave a little debris for wildlife so beneficial ground beetles have a place to live and birds can snack on seeds left on shriveled flowers.  Coneflowers, ornamental grasses and crocosmia all attract birds to their seed heads through the winter. 

The bottom line is to do those fall clean-up jobs as you have the time and energy.  Cleaning up in increments leaves height and interest in the garden and feeds the birds, too.

What you should do first, though, is to bring indoors houseplants that  spent the summer out on the patio. Also bring in any plants too tender to survive the winter outside. Be sure to inspect them for insect pests and wash them off.   Sub-topical plants  like tree ferns and bananas benefit from extra mulch to help them survive the worst of the winter weather.

It’s not too late to reseed thin spots on your lawn or apply a fall fertilizer to an existing one and if you have citrus trees, rhododendrons, azaleas or camellias they’ll benefit from an application of   Citrus use it for flower bud development and fruit sweetness.  Rhodies, azaleas, and camellias need it when flower buds begin to form.  It also improves flowering and root development of any plant and helps plants resist diseases and cold weather damage. 
 

What to do with Green Tomatoes

With night temperatures dipping down into the 30’s,  you may be thinking your tomato vines are done for the season.  But what about all those green tomatoes just hanging there?   Don’t let these underage beauties go to waste.    There are lots of ways to use them.   Opportunity is hanging on the vine, ready to be picked.
 
When fall frost approaches,you  can pick unripe, mature green tomatoes to ripen indoors. A mature green tomato has a glossy, whitish green fruit color and mature size.   Taste one by taking a 1/4" slice of a medium-size tomato and sample it.  Your taste buds will register a firm, fresh fruit with an immature tomato flavor and a hint of sweetness similar to a zucchini.    Select fruits 
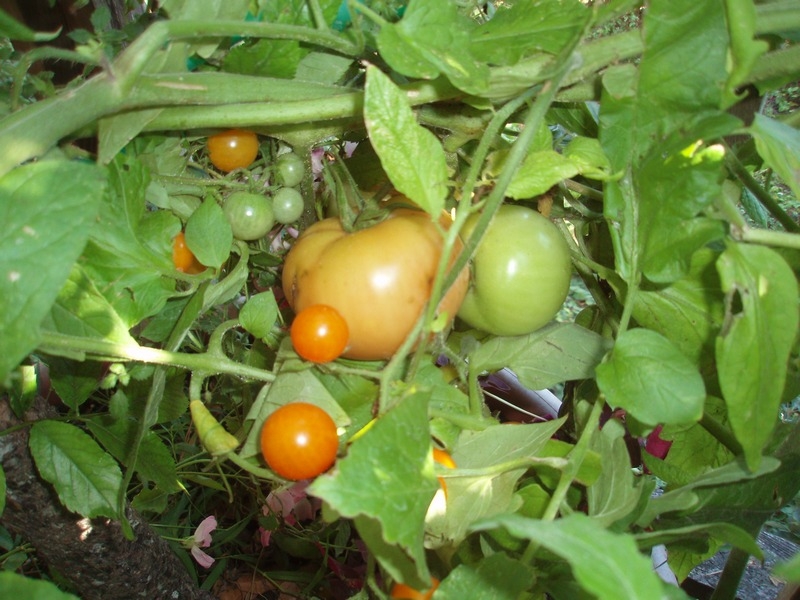
only from strong healthy vines, and pick only those fruits free of disease, insect or mechanical damage.  Remove stems to prevent them from puncturing each other and if dirty, gently wash and allow the fruit to air dry.

Store your tomatoes in boxes, 1 to 2 layers deep, or in plastic bags with a few holes for air circulation.
If you have a cool, moderately humid room, simply place them on a shelf but out of direct sunlight.  They may be stored in the dark also.

 As tomatoes ripen, they naturally release ethylene gas, which stimulates ripening. To slow ripening, sort out ripened fruits from the green tomatoes each week. To speed up ripening, place green or partially ripe fruits in a bag or box with a ripe tomato. Green, mature tomatoes  stored at 65-70 degrees, will ripen in about 2 weeks. Cooler temperatures slow the ripening process. At 55 degrees, they will ripen in 3-4 weeks. Storage temperatures below 50 degrees will slow ripening, but results in inferior quality.

If tomatoes  are stored where the humidity is too high the fruit molds and rots. If humidity is too low, the fruit shrivel and dries out. Since homes vary in humidity levels, you will need to learn by trial and error what works best.

 Tomatoes ripened indoors are not as flavorful as vine ripened fruits. However, compared to store bought, you will be delighted with your own home ripened tomatoes.

 If you have peppers still green on the vine, they can be ripened in the same way as tomatoes.  

Another way to take advantage of your late tomatoes is to use them green to make a culinary delight in the kitchen.  Again your green tomato must be of mature size.  Avoid the small ones.  They will have a bitter taste and can ruin your recipe.  Core a green tomato before use.  Unripe tomatoes often have a woodier stem and a unique core piece.  This hard, white core section is not always continuous with the stem, so you have to look for it.   It’s small, about the size of a pea and sits in the tomato somewhere within the top inch of where the stem attaches.  You can see and feel a hard white piece that’s different from the test of the fruit if you slice a tomato in half. 

We’ve all heard of fried green tomatoes made by coating tomato slices with seasoned flour, then an egg mixture and finally with panko bread crumbs.  Be sure to lightly press the slices between paper towels to remove excess moisture  before coating.  Then fry the coated slices in about 2" of oil, turning once.  Drain on paper towels and sprinkle with kosher salt.   They’re especially tasty if you brown a little crushed garlic in the oil first and then remove it.  
     

Another way to use them is to .  Golden-brown, carmelized green tomatoes produce a deep, rich flavor that is perfect with sauteed nectarines, peaches and apricots.  Even when baked, they hold their supple but firm texture and develop a delicate sweetness similar to an apple. 

 Extend your harvest and don’t let anything in the garden go to waste.
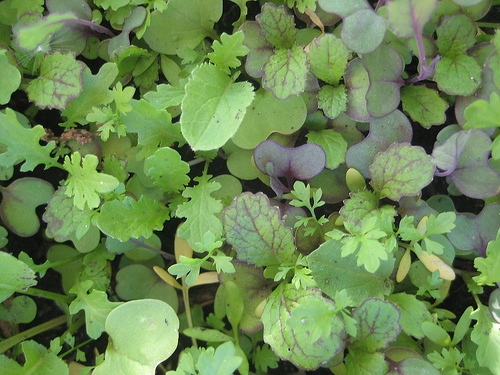
Homegrown carrots

 If you love carrots like I do,  now is the time to plant  the seeds  directly in the ground.

Carrots as we know them originated from forms grown around the Mediterranean.  By the 13th century carrots were well established as a food in Europe and came with the first settlers to America, where Indians soon took up their culture.

Flavor differs greatly among varieties and planting time affects flavor, too.  September is one of the best months to plant.  Carrots achieve their sweetest taste when the last few weeks of growth occur in cool weather.  Also, unless a carrot is bred to be harvested young, it won’t develop full flavor until mature.

Two ingredients determine a carrot’s flavor- sugar and terpenoids ( volatile compounds that impact the carrot flavor ).   Because terpenoids develop earlier than sugars, a carrot that is harvested too young might taste bitter. For peak flavor and texture, dig carrots anytime after they’ve developed a deep orange color.

Commercial carrot varieties have been developed for uniformity of shape, as well as for color, disease resistance and ease of harvest.  But home gardeners can select a carrot more for flavor than appearance.  So how do you choose the sweetest ones to grow?  

Carrots are normally grouped into several types-  Nantes,  Chantenay, Danvers, imperator and Paris market.   For flavor it’s difficult to beat a Nantes.    Nantes Coreless or Little Finger are two popular varieties.  They’re not a carrot you’ll find in the grocery store because they’re difficult to harvest commercially and don’t store well.  Both are juicy and sweet.  Nantes coreless grows to 6-7 " long, is blunt-tipped and fine grained.  Little Finger is unmatched for snacks, pickling or steaming.  It grows to just 3-4" long and is ideal for container gardening. too.  

Red Cored Chantenay has broad shoulders and strong tapered tips.  This wedge-shaped carrot is rarely grown by commercial growers.  For the home garden it produces 6" long carrots that keep well when left in the soil, store well after digging and are sweet and crunchy.  They perform well in heavy soil, too.

Danvers Half Long are another variety that are tasty raw, cooked, or juiced.   Carrots found at the super market are usually Imperators just so you know.

Whichever variety you choose to grow, prepare the soil by deeply working in organic matter.  Avoid fresh manure or your carrots will develop fine, hairy roots.  Remove exposed clods and stones from the soil and soak the bed before planting.  Scatter seeds thinly on top and cover with 1/4" compost to keep soil from crusting so the seed can punch through.  Firm soil gently and keep moist.

Germination take 10-17 days.  To help keep the tiny seeds moist, you can cover the seedbed with wet burlap just until they germinate.   When seedling have 2 or 3 leaves, thin them to 2" apart.  Keep soil deeply and evenly watered.   Control weeds with shallow hoeing.  Fertilize once a month and in a 60-75 days your carrots will be a deep orange color and at their peak flavor.  You just can’t beat pulling a sweet carrot straight from the earth for sweetness.  


Tips for growing beans, melons, squash and corn

You know the saying:  corn should be knee-high by the Fourth of July.  if yours is stunted or yellowish, one of the following factors may be the cause. Sweet corn is exacting in its growth requirements. Corn plants have extensive root systems and are very competitive. Thin plants to 12"-16" apart. Because corn is a heavy feeder, especially needing nitrogen, feed at planting 
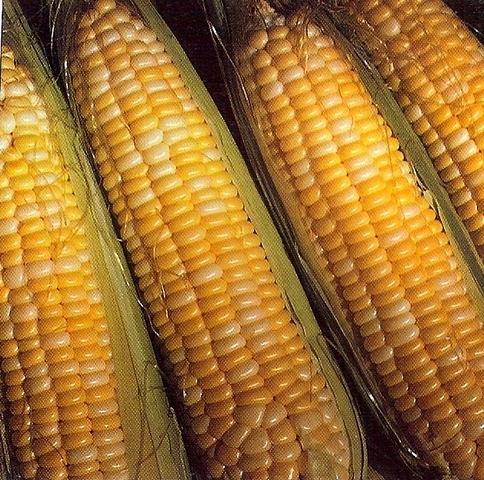
time, then side dress when the plants are 8" tall and again when they are 18" tall. Corn needs abundant water throughout the season but especially from tasselling to picking time. Lastly, plants need deep healthy roots that develop in soils rich in organic matter, Heavy, poorly drained soils will produce dismal crops.

If you grow melons and squash, the hot weather recently may have inhibited fruit set. Use a small brush to transfer pollen from newly opened male flowers to the female flower which has a slightly enlarged base. Dust pollen onto the stigma in the center of the flower. You can also take a male flower, remove the petals and gently shake it directly over the female flowers.

High temps may also be affecting your beans. If your plants look healthy but only have a few fully formed pods, hot weather may be to blame. Flowers can drop before setting pods or even deteriorate right on the plants. Beans prefer temperatures between 70-80 degrees. Plants growing in soil that is either too wet or too dry are stressed by lack of oxygen. Irregular watering contributes to this problem. Weakened plants produce few pods. When you get your beans producing, be sure to harvest regularly so energy goes to forming new pods not seed production in mature pods.

Many plants, both vegetable and ornamental, are bothered by aphids and other sucking insects as well as foliage and flower eating bugs. From cucumber beetles, fleas beetles, stink bugs, weevils, curculios to borers , the list of trouble makers is endless. . To help deter them mix up some pepper spray in your kitchen.

  • 1 tablespoon hot pepper sauce or 1 teaspoon cayenne pepper
  • 6 cloves garlic, crushed
  • 1 quart warm tap water

Let stand I hour, strain and spray plants either in the morning or evening.