Caring for Ornamental Grasses

rolling_hillsI’ve lived in California my entire life and have traveled on many a back road enjoying the scenery, the trees, the flowers, the birds. Discovering a new road, the road less traveled, is half the fun of any journey. It was close to sunset recently when I found myself on one of those roads. Actually I kinda got lost on my way to Aunt Rosemary’s house and ended up on the back side of Mt. Diablo. Serendipity, the occurrence of events by chance in a happy or beneficial way, was on my side.

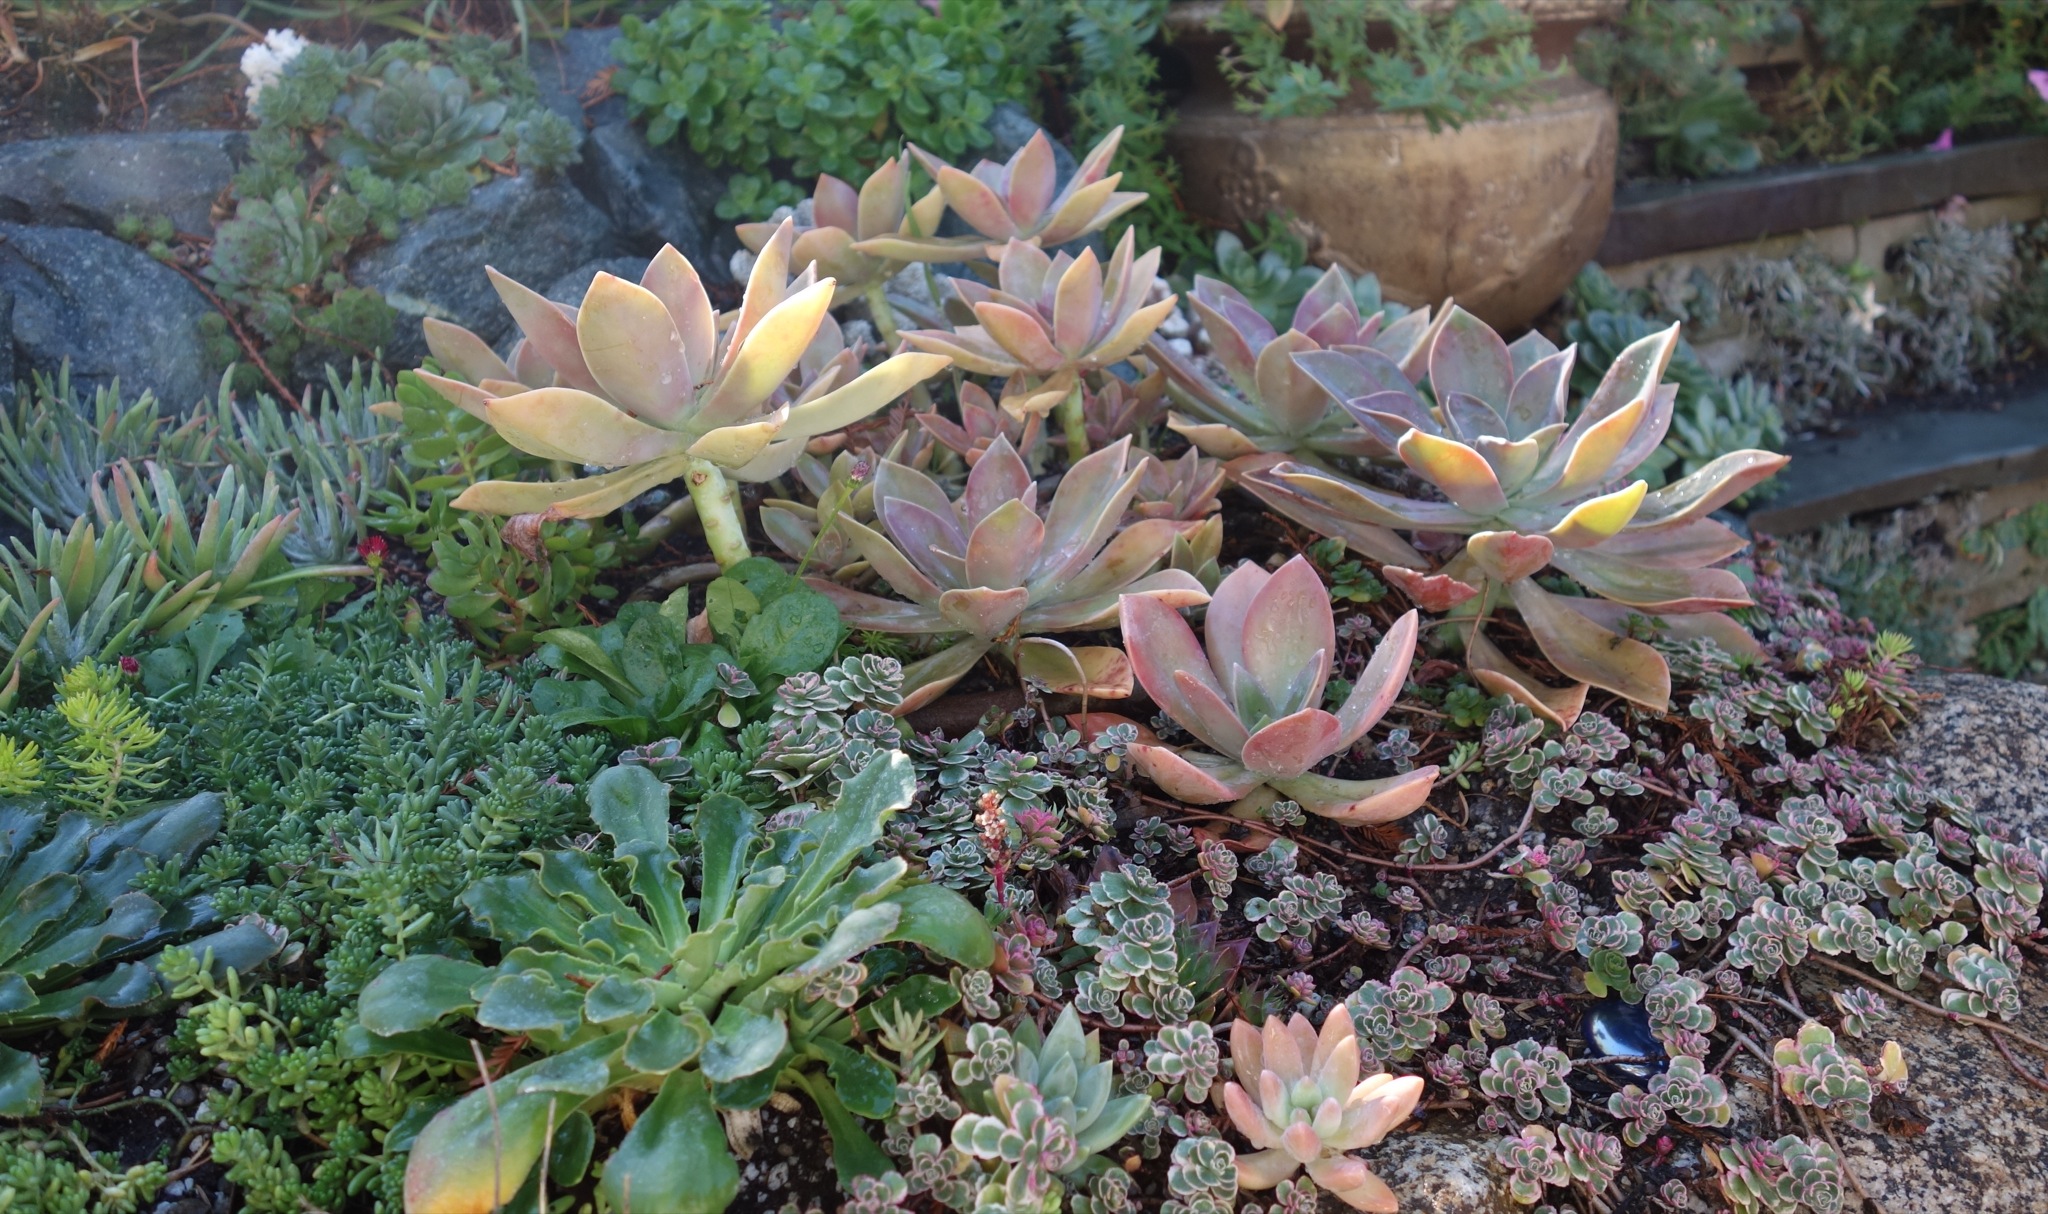
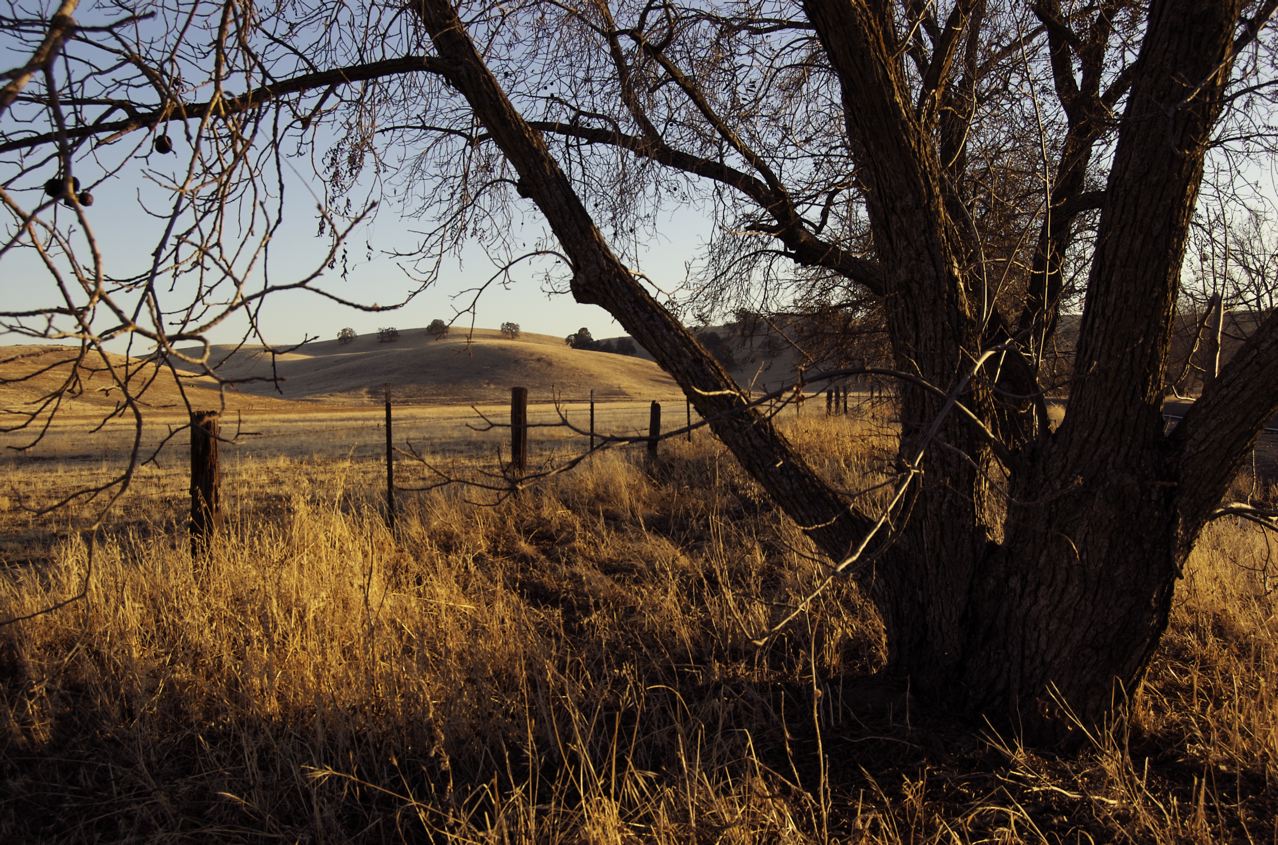
With the winter sun skimming the tops of the rolling hills and a meadowlark announcing his presence in the row of walnut trees growing along the road I was reminded of the seasons here in the mild winter areas of California. The setting sun filtered through the grasses tawny in late fall. These grasses are just one of the many ornamental grasses that grace our gardens. With winter coming on, some go dormant, some are evergreen and some are deciduous. How should you take care of the grasses in your garden?

If your grass is big like a miscanthus and now sports that beautiful wheat color as it goes dormant, you can enjoy the show to provide structure to the winter garden as well as seed and cover for wildlife. Come February or early March, before new growth starts from the base, tie the stems into a bundle with twine or a bungee cord and prune down to 10 inches using sharp hedge shears or electric hedge pruning shears.

But what about those other grasses and grass-like plants? How do you keep them neat looking and fresh throughout the year?

If it’s small and goes dormant, like Japanese forest grass, Japanese blood grass or Fountain grass, you hakonechloa_winter.1600can prune them anytime now until early spring. I like to leave them to provide winter interest through the holidays but there will come a day in January when the winter storms will start blowing the leaves everywhere. Then I’ll prune the stems down to 3″ for the shorter grasses or 6″ for the taller fountain grasses. If I prune too low there’s a danger of cutting into the crown of the plant. Moisture then tends to settle into the crown and can rot them out.

Then there are the spiky grasslike plants like New Zealand flax or Cordyline that stay evergreen but can look ratty after a long, hot summer or cold winter. Prune these anytime for cleanup or size reduction, midspring for rejuvenation.

Select the oldest or most damaged leaves and cut them from the base out one by one. To control size, cut out ton more than 2/3 of he tallest leaves at the base. If your plant has severe damage and needs total rejuvenation wait until midspring and cut down to 1 foot. It will regrow in about 4 months but may need retrimming as the leaves grow out.

carex_oshimensis_Evergold
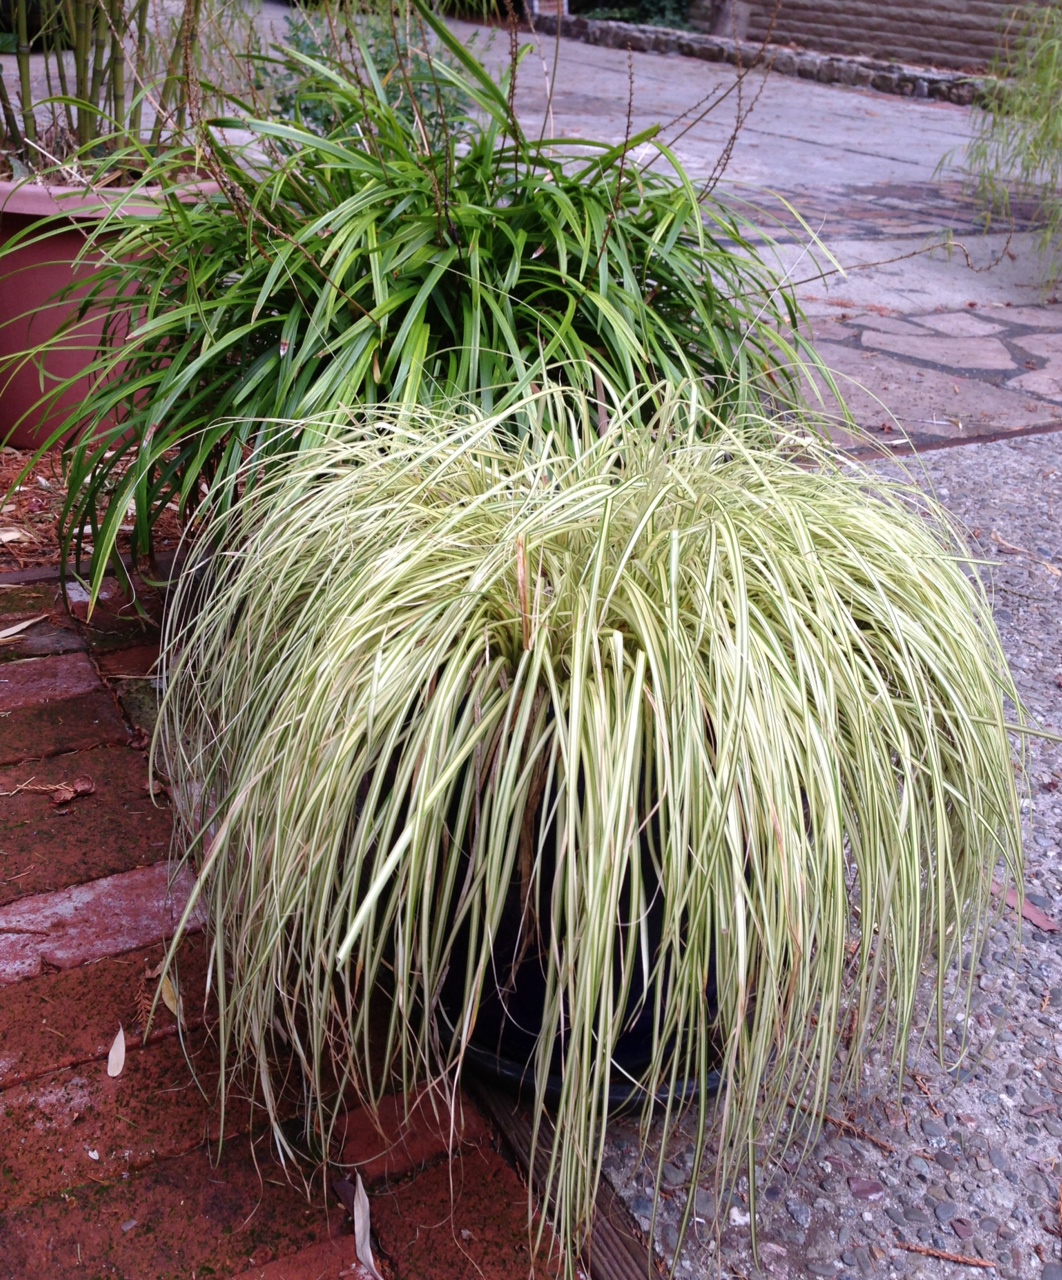
Lastly, there are those small grasses that stay evergreen such as Blue oat grass, Pheasant tail grass, Acorus, Mondo grass, Carex, Mexican feather grass and Liriope. Like the flaxes, clean up can be done anytime but pruning for rejuvenation should be done early to midspring.

If your grass is looking a bit disheveled, comb out the old stems. Rubber gloves work great for this as the spent foliage clings to the rubber and comes out easily. If you need to go for the big chop to bring it back to its former glory, wait until early spring and cut back by 2/3. Cutting back too much will allow moisture to gather in the crown and cause rot. Rejuvenation pruning shouldn’t be done more than every 2-3 years as small evergreen grasses have less vigor than grasses that go dormant. Mexican feather grass is the exception and can be pruned back hard anytime its needed.

So that’s all there is too it. Decide if your grass is large and goes dormant, small and goes dormant or large and stays evergreen and take it from there for beautiful ornamental grasses year round.

Garden Tasks for Late Fall

honey_mushroomsIt came out of the earth suddenly, pushing soil and plants that were in it’s way to the side. Just a bit of moisture had allowed this large clump of honey mushrooms to emerge and start its path to reproduction. At this time of year when the trees are turning the color of flame and some have already gone into dormancy it seems the earth is growing silent. Winter will soon be here. For nature life continues. Look around you and be thankful for the bounty, the restfulness, the time to enjoy these beautiful mountains that we call home.

The Giant Pacific salamanders in the forest duff are resting up for next seasons batch of young. Maybe now that we’ve had some rain the deer will have something to eat other than my garden. young_buckAs the weather cools, my garden plants are looking past their prime. The seed heads that remain invite small song birds to feast on what remains. Chickadees hop from plant to plant. They even find something to eat in the Japanese maple leaves and the old dried hydrangea flowers that have turned a dusty rose color. Spotted towhees scratch for seeds buried under fall leaves. I’m always slow to cut down and clear everything away but  there are some things I should be doing this autumn. I’ll pay if I leave everything for next spring when it all needs doing at once.

First, I’ll cut back perennials such as hostas, asters and mums, which collapse into a gooey mess and shelter slugs and snails. I’ll pick up and dispose of diseased  leaves, especially under the roses to prevent pathogens from spreading. Coneflowers, ligularia and rudbeckia flowers and ornamental grasses can stay to contribute winter interest for me and the birds.

I’ll leave as much foliage as possible to provide cover, protection from cold winds and foraging spots for other critters and good insects. I’ll wait to cut back the stems and foliages of not only the grasses but evergreen perennials, salvias, hardy fuchsias until spring. There are few things as rewarding as seeing your winter garden turn into a sanctuary for wildlife.

As weeds emerge I’ll spend a little time here and there keeping up with them. There are 300 dormant weed seeds per square inch of soil and I don’t want to add to that.

I don’t have the space to plant a cover crop so I like to top dress the soil with compost or bark chips. I have a few new trees that need staking to secure them through the winter. This prevents breakage and allows new roots to grow deep and stable. Be sure to set the stake on the windy side of the tree and tie loosely so it has some wiggle room This movement stimulates the trunk to grow thicker. Come next summer the trees will  probably be ready to stand on their own. I don’t want to keep them staked longer than necessary. Also check any trees or shrubs that were transplanted and are still tightly bound to a stake. Remove or reset the stake so the trunk will not become girdled as it grows.

OLYMPUS DIGITAL CAMERAA word about all those leaves that cover the ground, the lawn and the perennial beds at this time of year. You can build up your garden soil by running a mower over them to chop into smaller pieces and spread over the soil. Worms and other organisms will start to break them down right away. Next spring dig what’s left into the soil. If you leave more than an inch or two of whole leaves on top the rains will compact them into a soggy mess and prevent oxygen from reaching the soil. If you have too much of a good thing when it comes to leaves, it’s best to put them into your green waste can.

Hummingbirds still need a nectar source at this time of year. Anna’s hummingbirds live in this area all year long.  They need your nectar even more in the winter when very little is in bloom. My abutilons are a winter favorite for them in my garden. Keep your feeders up year-round and keep them clean.

A Succulent Wall Like No Other

succulent_wall.1280I designed other parts of this garden but this area was all hers. She’d been interested in cactus and succulents for a long time before deciding to combine her passion for these plants and her love of gardening to a problem spot in the garden. The results are jaw-dropping impressive and I was honored to visit this garden and get a private tour. My friends live on the river in Ben Lomond and working as a team have created a living wall on a slope that runs the length of their driveway rising steeply up to a road on the upper side.

Most people would have built a block retaining wall and added a few low water use plants for erosion control and called it a day. But not this couple. He’s a rock hound and has collected specimens on every vacation and job site for a very long time. “His rock collection became so large we needed to bring them out in the open and put them in a place where he could see them daily”, she says. My eyes were riveted on a mosaic of colors as the various stones of jasper, jade, granite, graptopetalum.2048serpentine, travertine, chert, sandstone, obsidian, lava and limestone intertwine. “The wall has been quite an adventure”, the couple says casually as my eyes darted back and forth, up and down admiring each vignette. Almost all of the succulents and cactus plants were obtained for free from discards and generous friends and the garden art in the wall was found on construction sites and recycled. The wall itself is an ongoing labor of love. Starting just a year and a half ago with a short block wall as the base, this living succulent wall has been built with mortar, rebar and dry laid stones and even has a sturdy set of stairs, a flagstone and pebble path and several places to sit and take in its beauty.

I couldn’t take my eyes off the beautiful rock walls and colorful succulents that filled every crevice and cascaded down the rocks. How do you make it so stable I asked? “A good mason handles a rock only 9 times”, he said with a laugh. Seems there’s a story that accompanies every little section. An unusual black ornamental lion_fountain.1600iron railing surrounds a tiny slate patio at the top. It consist of typical sunflowers on the sides but in the middle of each section is a bat with wings extended. Really gets your attention I have to tell you. I was told that Johnny Weissmuller of Tarzan fame used to live in Ben Lomond. He had a patio made for his aging mother and this was the surrounding railing. It arrived via some friends who now own the house and said they could have it as long as they never sold it. Along with some rocks from Tarzan’s old garden it is permanently installed in the succulent wall. At the top of the wall along the road lives a red rose that’s been in the garden a very long time. Story goes that a neighbor distributed these roses to many in the neighborhood and they originally came from Eleanor Roosevelt when she visted the area. Succulents for the wall are part trial and error, part research.

Drainage for any succulent is a must so first a mix is created using pumice, gravel and sand. This is used for the pockets in the wall and also for containers which are filled with rocks and only a few inches of the mix is added to the top. They have found that by using frost blankets over only the most frost sensitive varieties their collection survives our winters. The first winter they did protect them while getting established but now they are on their own. Even if some turn to mush, I was told, they are cleaned up in the spring, replanted and grow back just fine. And being succulents they multiply and there are even more to tuck into crevices the next year.

The wall contains hundreds and hundreds of plants, both succulents as well as other plants that my_garden_rock.1024provide colorful foliage and contrast to the rock. A new section is being developed with dark green serpentine and orange jasper rocks. Blue chalk stick (Senecio vitals ‘Serpents) is just one of the succulents growing here along with several varieties of crassula, echeverria, graptopetalum St. Ives, agave, sempervivum and aloe. There is a pink and blue section and a chartreuse and burgundy section, too. Every color of the rainbow is represented. Every succulent garden is unique and the owner’s of this one have created their own astonishing living wall. From fossil rocks shaped like hearts to slate pavers chipped into a heart shape to Hens and Chicks growing in the rock crevices and forming a heart, this garden shouts love.

Tree Pruning Tips

limbed redwoods.1600The big wind we experienced not long ago was just the beginning of the wild weather that is coming our way. Looking up at the trees violently swaying from one side to the other I wondered how they could survive such strong wind gusts. Not all of them do survive coming down and blocking driveways, roads and sometimes landing on a house or a car. There are ways of trimming, pruning and managing trees that can help them stay upright in a strong wind. Don’t endanger yourself, your family, your property or your valuable trees by mismanaging this valuable resource.

You’ve seen it. A homeowner wants more sun and has their redwoods limbed way up so there is just a a tuft of branches and foliage at the top. Living in the forest myself I can understand the desire for more sun. Why is this bad for your trees? What is a better way to ensure the health of the tree and still have space to walk or park under them or open up a view?

Raising the height of the lowest branches or limbing up is often done to create clearance in an area where people will walk or park. Seven feet is your target height . Over pruning removes many of the energy producing needles and leaves taking away most of the trees ability to photosynthesize. Evergreens don’t have food reserves like deciduous trees. They may even die completely in 8-10 years or topple in a heavy wind because they have become so top heavy and have lost their windbreak effectiveness.

Removing the lower limbs of redwood, cedar, pine or other conifer is needed to remove dead and dying branches which improves circulation and makes them more fire resistant. It’s done naturally in the woods when limbs die and fall off. If you must remove live lower branches do it over a longer period of time to reduce stress on the tree. The amount trimmed off should not exceed 25% of the total foliage. 10-15% is better but not always attainable.

Windowing of a tree should follow the same guidelines. To open up a view and preserve the health and beauty of your trees, here are some ways to make views and trees work together. According to Plant Amnesty, windowing or cutting selected branches, works best when the subject is a large, close-in tree blocking your view. By carefully choosing what to cut you can open a window in that tree to give you a fully framed view of whatever lies beyond. Like most pruning, there’s a certain amount of art involved in this. Never top a mature tree it’s arboreal butchery.

If you’re trying to decide whether or not to limb up evergreen trees in your yard, do your homework first. Oregon State University Extension Services recommends pruning when the treclear cut hillside.1600e is not actively growing. This is late winter to very early spring, well before any new growth will take off in the new season. For our area January and February is best. Redwoods go into a short period of dormancy at that time making it the best time for pruning. This gives them a chance to heal the cuts you make with their first burst of new growth in the spring.

Another scenario that wreaks havoc with the land is to clear cut large sections of forest. When you do this the trees left behind on the fringes are not prepared to deal with high winds. They grew up being protected by the trees around them and their trunks are not as strong. Trees channel the wind over the top and buffer it before it hits the ground. By clearing the land completely the wind barrels through the open area and hits the next thing in its way which may be your house or deck or landscaping. It’s better to remove selected trees completely.

Put away the saw and enjoy the beauty of your mature evergreens. Prune lightly. Preserve your trees natural shape. A properly pruned tree will look as natural as possible.

Growing Cover Crops – Part II

Orin_Martin_bell_beansOrin Martin of the Alan Chadwick Garden on the UCSC campus is widely admired for his incredible knowledge and skills as a master orchardist, horticulturalist and teacher. I was lucky a couple of years ago when he visited a group of fellow designers and brought his favorite russet apples. Another time he brought a dozen different kinds of potatoes that we roasted, critiqued and thoroughly enjoyed.

The Alan Chadwick Garden was nothing but poison oak and chaparral in 1967 when Alan Chadwick first got his hands on it. Martin came to UCSC in 1969 as a literature major but was soon impressed with Chadwick’s work, preaching the gospel of treating the garden as a self-nourishing system. Together they worked the garden, building the soil and teaching others.

Now Martin runs the appreaster_Michaelmas_daisy.2048ntice program which teaches future organic gardeners and shares his knowledge in workshops like the Cover Crop class I recently attended.

Last week I wrote about how and why to plant cover crops. This is what to do next spring after they’ve done their magic in the soil fixing nitrogen.

Cover crops are plowed or skimmed off in late February to early April. Because it takes 3-5 weeks for the cover crop to break down so crops can be seeded or transplanted, it is often best to skim off the cover crop at the base of the plants and combine with straw or leaves to make compost. Previously made compost can then be applied to the surface. It is important to retain the roots and nitrogen-filled nodules in the soil. Take only the vegetative portion.

cover_crops_Orin_Martin.1280Another method is to skim the foliage with a weed wacker or mower chopping it into small pieces 1/4″ to  4″ long. You can then rototill this into the soil and allow it to decompose on its own. In about 2 weeks the material should be broken down to be unrecognizable as plant material before replanting.

If you are developing your soil to build organic matter and improve structure incorporate the cover crop at a more mature stage (half to full bloom) when it has a higher carbon content. The nutrients will be stored in the reservoir of humus and released slowly over a number of years.

On established soils where you want primarily to fertilize next spring and summers crops, incorporate the cover crop after skimming and chopping when it has just started to flower as it decomposes quickly at this stage.

The Chadwick Garden fertilizes its established fruit trees by simply cutting down the cover crop growing at their base with a machete at the 25% flowering stage. 4-6″ of wood chips are laid over the chopped up pieces and left for nature to decompose. That’s all their is to it. Martin explained that the garden used blood meal and the organic fertilizer, Sustane, during the first several years while the trees were becoming established.

Picking up a clump of grass sown just 2 weeks ago, Martin teased off the soil to show the vigorous, fibrous root mass. “This is why the riches soils of the world, the Steppes of Russia and the original Midwest prairies, are so fertile and are called bread basket soils”, he explained.

Plant a cover crop this fall and your soil will be richer for it.

Growing Cover Crops- Part I

Every drop of rain that hits bare soil is destructive. Over 3000 years ago the Chinese knew how to protect their soil from erosion and increase fertility by planting cover crops. Early Nile Valley inhabitants 3500 years ago also practiced this method of agriculture as did first century Romans. Lupines were planted in poor soil when no animal manure was to be had. I learned this and also how to protect and improve my soil from Orin Martin, manager of the Alan Chadwick Garden at a cover crop workshop recently on the campus.

aster_Michaelmas_daisy.2048“It’s all about the biology of the soil”, Martin said. “You grow the soil that helps you grow the plants”. A cover crop is really anything that covers the soil and protects it from rain, trapping nutrients and preventing them from leaching downward, he explained. Cover crops can increase the tilth of the soil. Quick germinating grasses easily loosen the top foot of soil with their root mass. Legumes have a tap root, a bio drill, that penetrates 30″ downward while alfalfa roots can grow even deeper.

Cover crops like bell beans, vetch and fava beans are especially valuable as they increase nitrogen levels in the soil in two ways. Atmospheric nitrogen can be “fixed” and left in the soil to fertilize subsequent crops. This is in addition to the nitrogen left from the foliage of the legume.

Cover crops are also called green manure when they are chopped up and turned into the soil in spring lettuces_after_cover_cropping.1024before going to seed. The planting of legumes like peas and beans can actually increase nutrients in your soil giving you a net gain which is needed to offset what you take out of the soil when you harvest fruits, vegetables and flowers.

From late September to the end of November is the best time to sow cover crops. You will need to irrigate lightly a couple times per week if it doesn’t rain. You can also wait to sow just before the rains start. Be careful about working overly wet soil however as you can ruin the structure of your soil.

The Chadwick Garden, Martin explained, originally was heavy red clay. 35 years of soil building with bell beans and vetch cover crops and compost have established a level of fertility that now supports several acres of vegetables, fruit trees, berries and beneficial flowering plants. Fall-sown, spring ploughed-down cover crops are the sole fertilizer used for the better part of the last decade.

Soil_builder_cover_crop_mix.1600Martin explained that recent research now recommends planting a tandem of grasses and legumes. Annual cereal grasses such as oats, rye and barley germinated quickly to hold and shield the soil until the legumes take hold. Bell beans, fava beans and vetch which are the best legumes for our area grow slowly the first 3 months then take off growing 70-80% in the last 3 months. The ratio of grass seed to legumes can vary from 10% to 30%.

There are other legumes that fix nitrogen but no where near as efficiently as bell beans.  Crimson clover seed is also more expensive, needs lots of water to sprout and competes poorly with weeds. Mustard causes competition with the fruit trees as bees will concentrate on the mustard flowers instead of the fruit tree flowers.

A question came up about using inoculants on legume seed. Martin explained that our soils have a native resident population of good bacteria that will break down the seed coat and encourage the plant roots to fix more nitrogen especially after cover cropping for a few years.

We all followed Martin out to the cover crop trial plots to see how the different types were growing. Bark chips will soon be applied to the paths. All of the gardens are mulched several times per year with wood chips. A 10 year study, Martin explained, demonstrated the amazing benefits of ramial chipped wood which is the type the tree service companies provide for free.

We watched him work the soil lightly with a metal bow rake then broadcast 8-10 seeds per square foot. Weeds were already cleared but Martin said this step doesn’t have to be perfect. Afterward the area was raked again lightly 1-2″ down and covered with 3-4″ of straw. Wood chips would be fine, too. Mulch heavier if you have bird competition. Cover crops are vigorous and will come up through just about anything, he said.  Water in lightly.

There are 3 ways to fertilize, Martin said. You can buy chemical fertilizer which is expensive and doesn’t do much for the soil. You can apply compost, which being carbon based, ramps up beneficial fungal organisms in the soil. Or you can cover crop or grow green manure which increases beneficial soil bacteria. Orin Martin has proof of the benefits of the last two methods.

The Mountain Gardener's Weblog